
Skip to main content
GageList’s Report Builder is a powerful tool that lets you build your own reports with greater control over the format. You can add filters and sorting criteria, choose which columns to include, and determine their order. You get more focused, relevant reports tailored to your specific requirements. Save your reports for future use and export them in various formats, including Excel and PDF.
With Report Builder, you can filter and sort data, order columns, and create custom report templates which can be stored for future use. Reports can also be exported in different formats, making it easy to share data with others and use it in other applications.
Navigating to the report builder
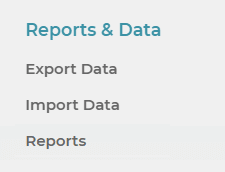
- On the left sidebar, click the Reports & Data icon.

- Select Reports in the slide-out menu.
- The section titled Report Builder is where you can view, build, run and manage your reports.
Managing your reports
Adding a report
- Click the Add button at the top-right of the view.

- Build and save your report to add it to the list.
Renaming a report
- Select your report in the list.
- Update the Report Name field value.
- Click Save.
Deleting a report
- Select one or more reports to be deleted using the checkboxes on the left of each report name.
- Click the Delete button at the top-right of the view.

- When prompted, click OK to confirm.
Building and running your report
- Fill and complete the report builder form.
- Report Name: The name used to identify your report.
- Last Calibration (Range): Filtering type for last calibration values.
- Last Calibration (From/To): Filter option for gages with last calibration values based on a date range.
- Due Date (Range): Filtering type for due date values.
- Due Date (From/To): Filter option for gages with due date values based on a date range.
- Include Inactive Gages: Filtering option to include or exclude gages that are considered as inactive.
- Group By: Groups gages with matching values based on a specified field.
- Report Format: The report’s output format (Excel or PDF).
- Report Columns: The included columns ordered as they appear in the report.
- To add a column, drag and drop fields from the Available Columns section to the Report Columns section.
- To remove a column, drag and drop fields from the Report Columns section to the Available Columns section.
- To reorder columns, drag and drop fields in the Report Columns section where the top-most field listed will be the left-most field in the generated report.
- One or more columns can be sorted by clicking the arrow icons to the right of each field name in the Report Columns section. Sort priority starts from the top-most field in the list to the bottom. If the arrow icons do not appear, you may need to save your report first.
- Click Save if you would like to store the report configuration for re-use.
- Click Run Report to generate your report.