
Calc-Assist allows users to quickly verify whether test results are within range of their minimum and maximum values. The tool can be used to set up each calibration test point with an expected range which is then tested against the “As Found” and “As Left” values. To avoid configuring this more than once, set up can be done on the gage record’s test template and re-used when calibrating related gages.
Note: This feature is only available for “Detailed” calibration tests.
Enabling Calc-Assist
-
- Go to General Settings (found under Settings on the left sidebar).
- Scroll down to the checkbox options.
- Click the Enable Calc-Assist checkbox.
- Click Save.
Note: The checkbox “Select pass/fail based on As Left calc-assist” may also be enabled for automatically setting the Result field when As Left is entered.
Setting up Calc-Assist on a Test Template or on Calibration Test Data
-
- Go to the gage’s test template or calibration record’s test data in edit mode.
- Click the gear icon next to the “Nominal | Minimum | Maximum” text field. If a row with a gear icon does not appear on screen, you may need to click Add Row first.

- Enter the related Attribute value.
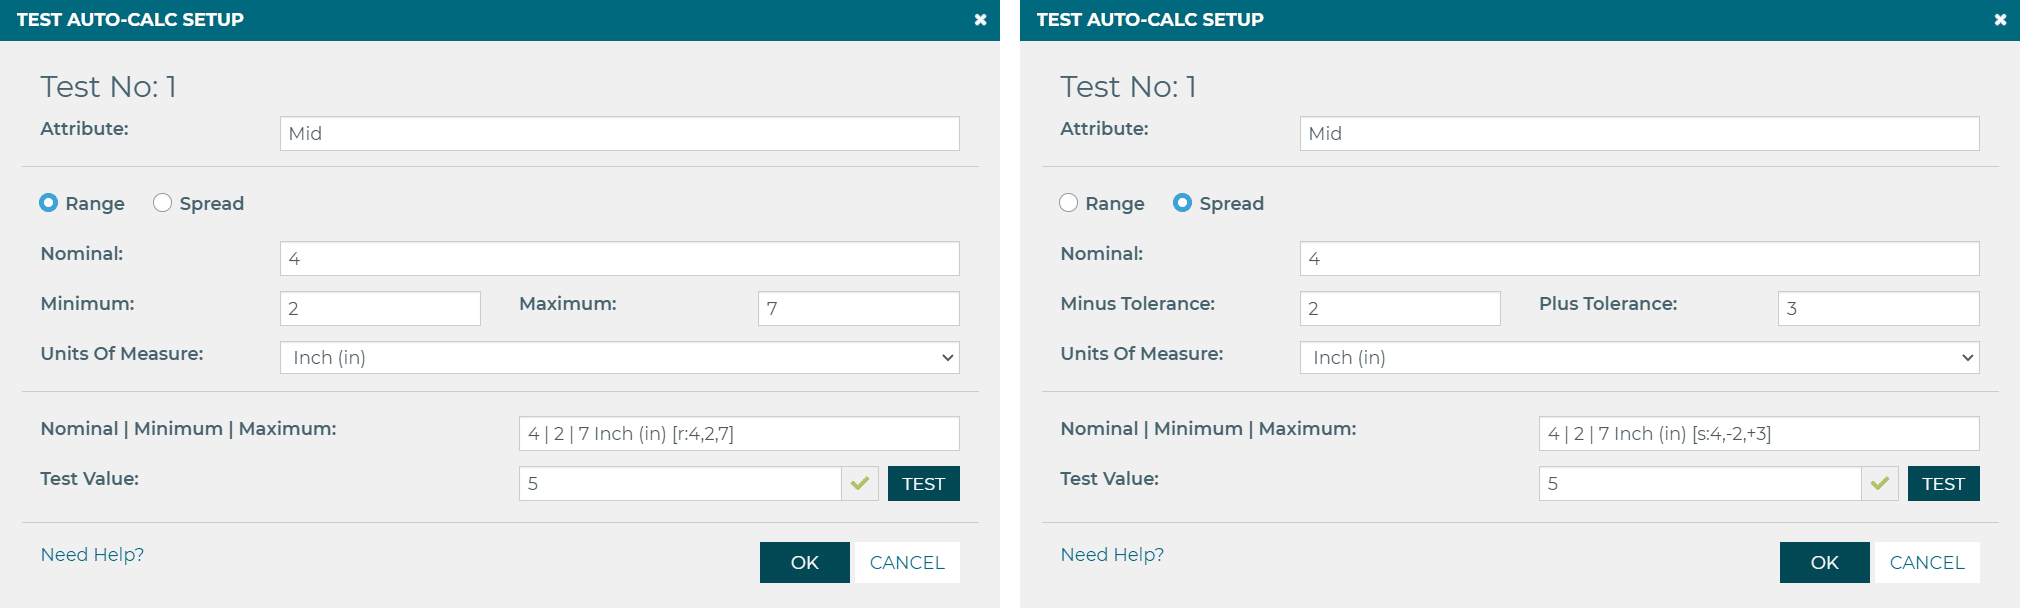
- Select either Range or Spread.
- Range Allows the user to directly specify the Minimum and Maximum values.
- Spread allows entry of Minus Tolerance and Plus Tolerance values which are subtracted and added to the Nominal value as minimum and maximum respectively.
- Enter the Nominal and Minimum/Maximum or Minus Tolerance/Plus Tolerance values.
- Select the related Unit of Measure.
- Enter a test value and click TEST to verify the range is set up properly.
- Click OK.
Note: The text before the “[” (open-bracket character) in the “Nominal | Minimum | Maximum” field can be adjusted since it doesn’t affect the calculation.
Using Calc-Assist in Calibration Test Data
- After setup, go to the calibration record’s test data in edit mode.
- If the calc-assist setup was done on the gage’s test template, apply the template to the test data.
- Enter values in each of the “As Found” and “As Left” fields.
- Notice the indicators beside the fields update based on the value and specified range. If enabled in settings, the Result field (Pass/Fail) will also update based on the As Left value. This value can still be set manually.
Identifying Test Indicators
The colored icon indicators below are used to show the status of the test result.
![]()
- Grey circle: The test value is blank.
- Green check: The test value is within range.
- Orange “X”: The test value is not within range.
- Red “!”: A syntax error exists in the calc-assist setup and/or the entered test value.